

How I use AfterShoot AI Photo Culling to speed up my workflow
For about a year now, I have used AfterShoot AI culling software to speed up my post-processing workflow. AfterShoot is a powerful tool that quickly reviews all your photo files and makes decisions for you based on your settings. It is designed to detect duplicates, blurry photos, closed eyes, etc.
If reading these instructions helps you decide to try out AfterShoot, please consider using my referral link to get 10% off. This will benefit us both!

What AfterShoot Is: a powerful culling software that will take step 1 of your culling process from massive to manageable.
What AfterShoot Is Not: a software that completes and perfects your entire culling process for you. This IS NOT going to do your final cull. If you're expecting it to do that, you're bound to be disappointed. (And if it had the means to do a final cull, it would demand much more than $10/month). As AI becomes better and better, I would expect AfterShoot to also improve, but it’s never going to be perfect because photography, like any artwork, is subjective.
How Do I Optimize AfterShoot?: I often get asked what the “secret sauce” is to make AfterShoot work best. Each user has their own needs, but you’ll see the key to how I get AfterShoot to significantly reduce my workflow time is to not overcomplicate it. At its core, AfterShoot (and really the culling process itself) is binary. In the end, what you really want to know is simple: Keep or Don’t Keep. Here’s how I have my settings, and how I do my final cull in order to cut to the chase on that process:
MY THRESHOLD SETTINGS:
I run these about as strict as possible:

MY PREFERENCE SETTINGS:
‘Selected’ = Green label, no star rating
‘Sneak Peeks’ = Yellow label, no star rating
‘Duplicates’ = No color label, no star rating
‘Blurred’ = No color label, no star rating
‘Closed Eyes’ = No color label, no star rating

And, that’s it for settings! Really? Really. All I am having AfterShoot do for me is label my keepers green! Is there a better way? I am sure there is! This is just what has worked out well for me. You can set your own labeling settings however you see fit per your workflow.
My final cull
I run the AfterShoot AI cull and import all the photos into Lightroom simultaneously, usually at night right after the photoshoot. The next morning, the culling and import should be completely finished. Within Lightroom, I select all photos and sync the new AfterShoot meta information to them. This is done by selecting all the photos > Right Click > MetaData > Read.
Keep in mind, that running AfterShoot while I import photos into Lightroom takes absolutely no additional time since I’m doing it simultaneously during the import (and while I sleep). I don't see any downside to running AfterShoot this way. That being said, it does work your computer, so if you’re going to be working at this time, expect the delays of a maxed-out CPU.
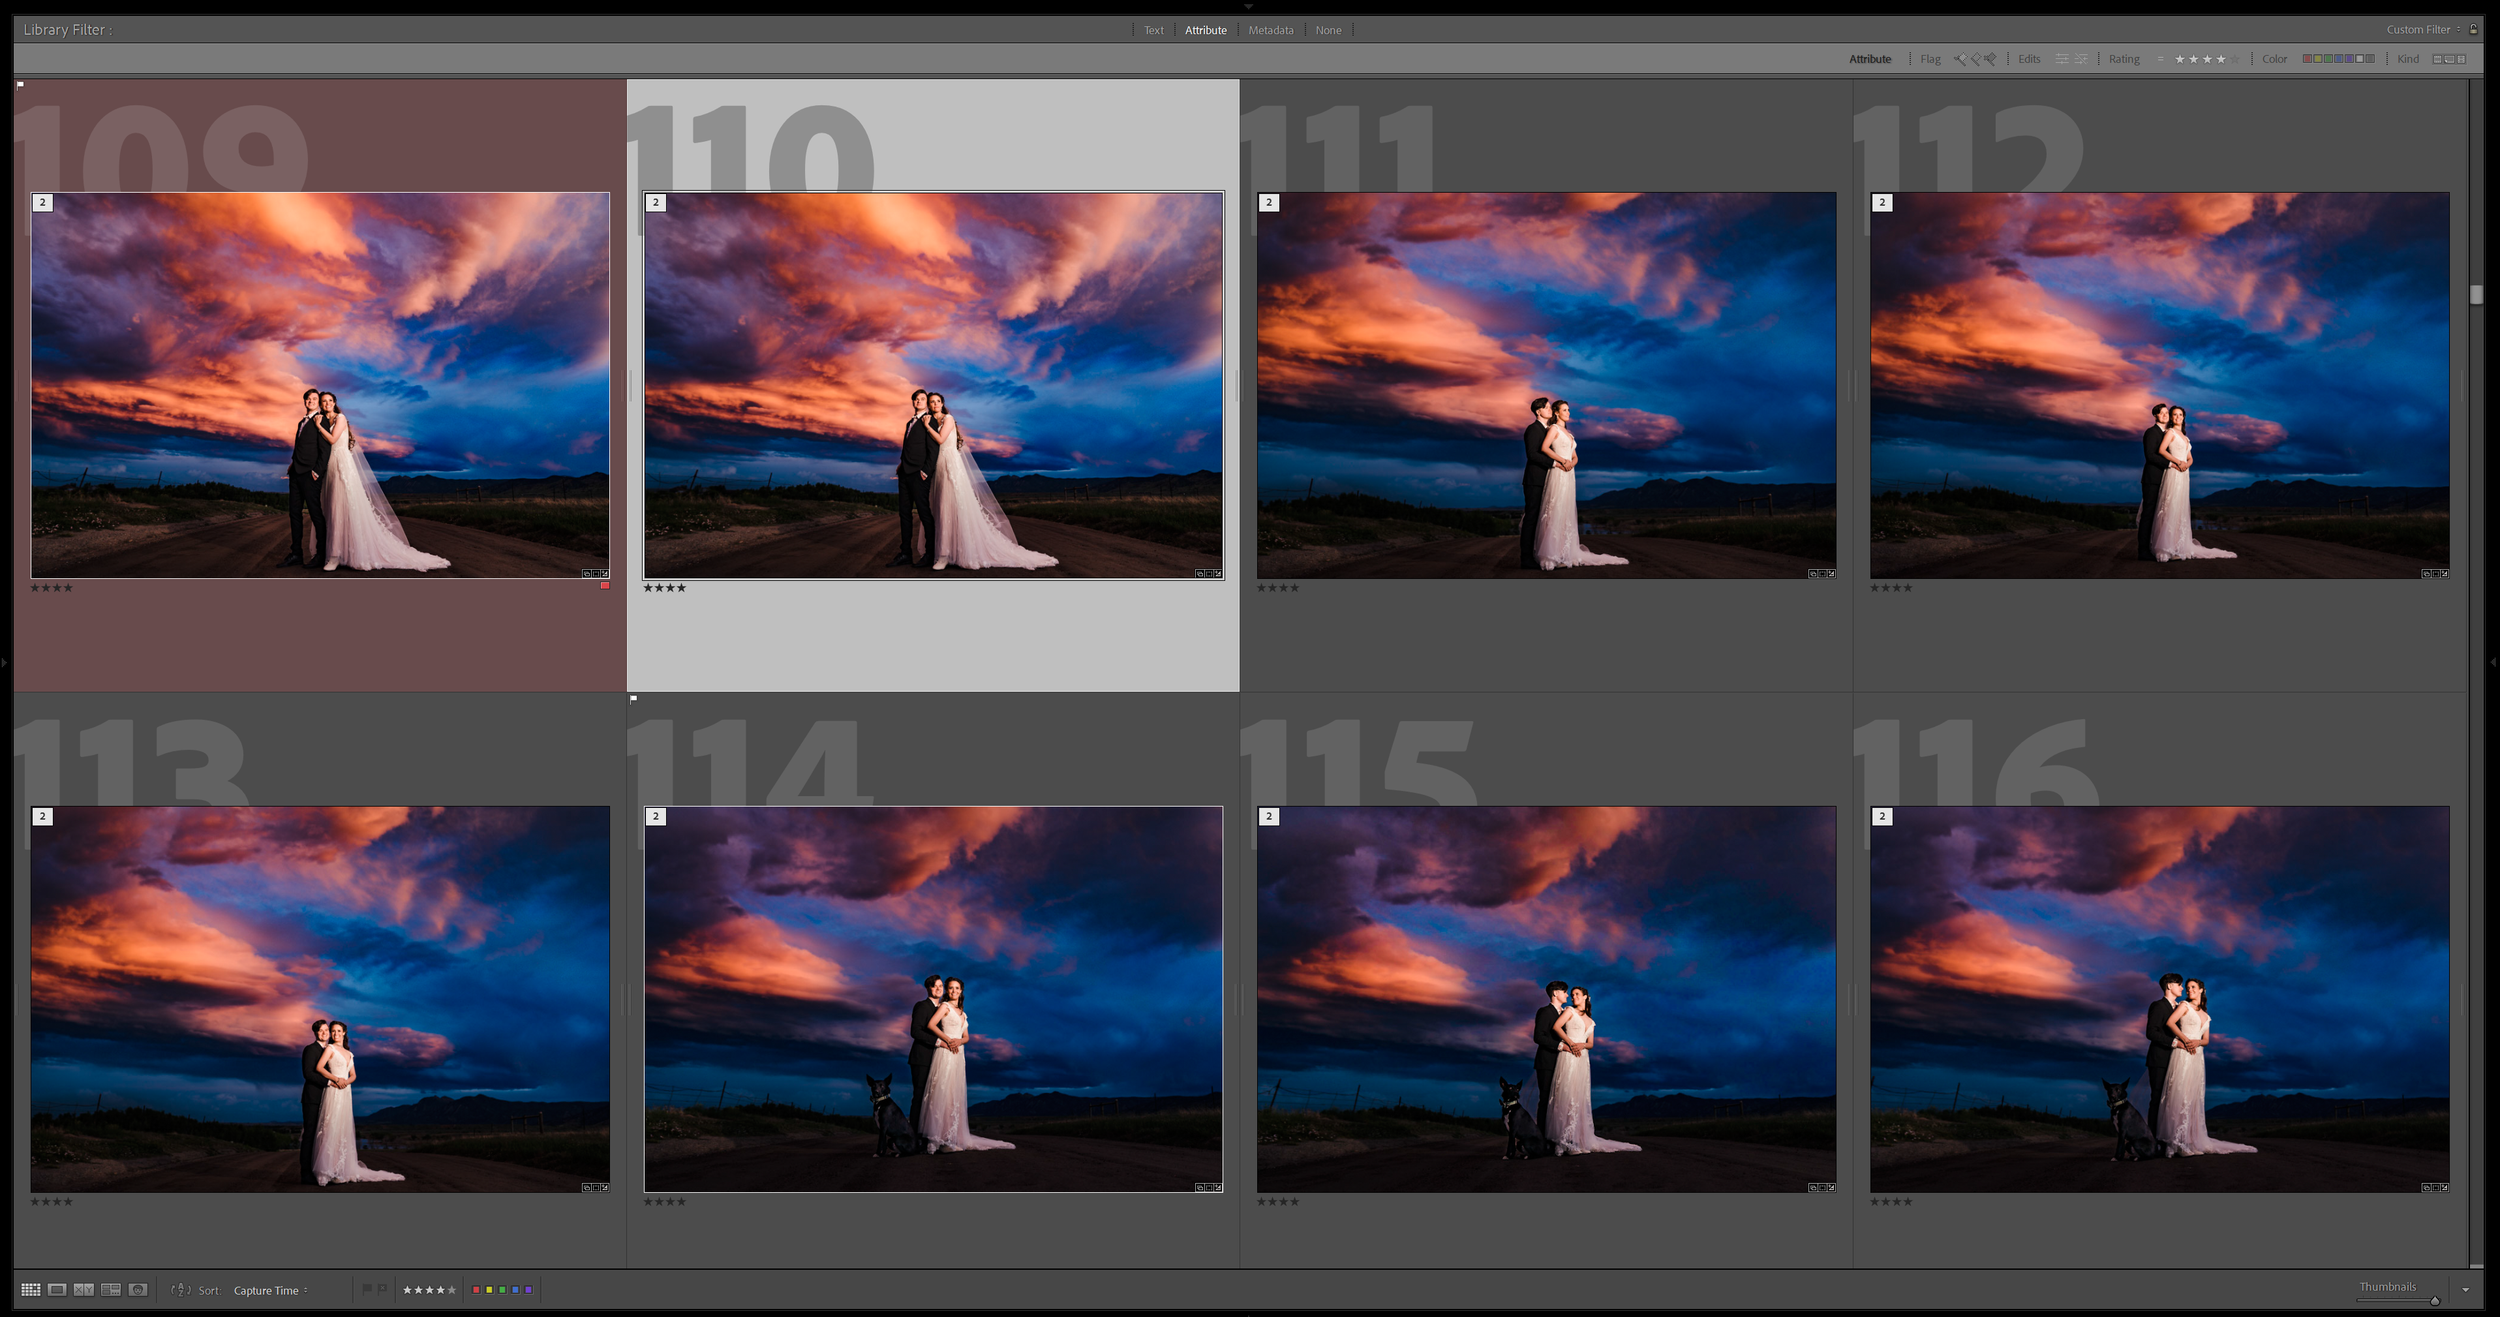
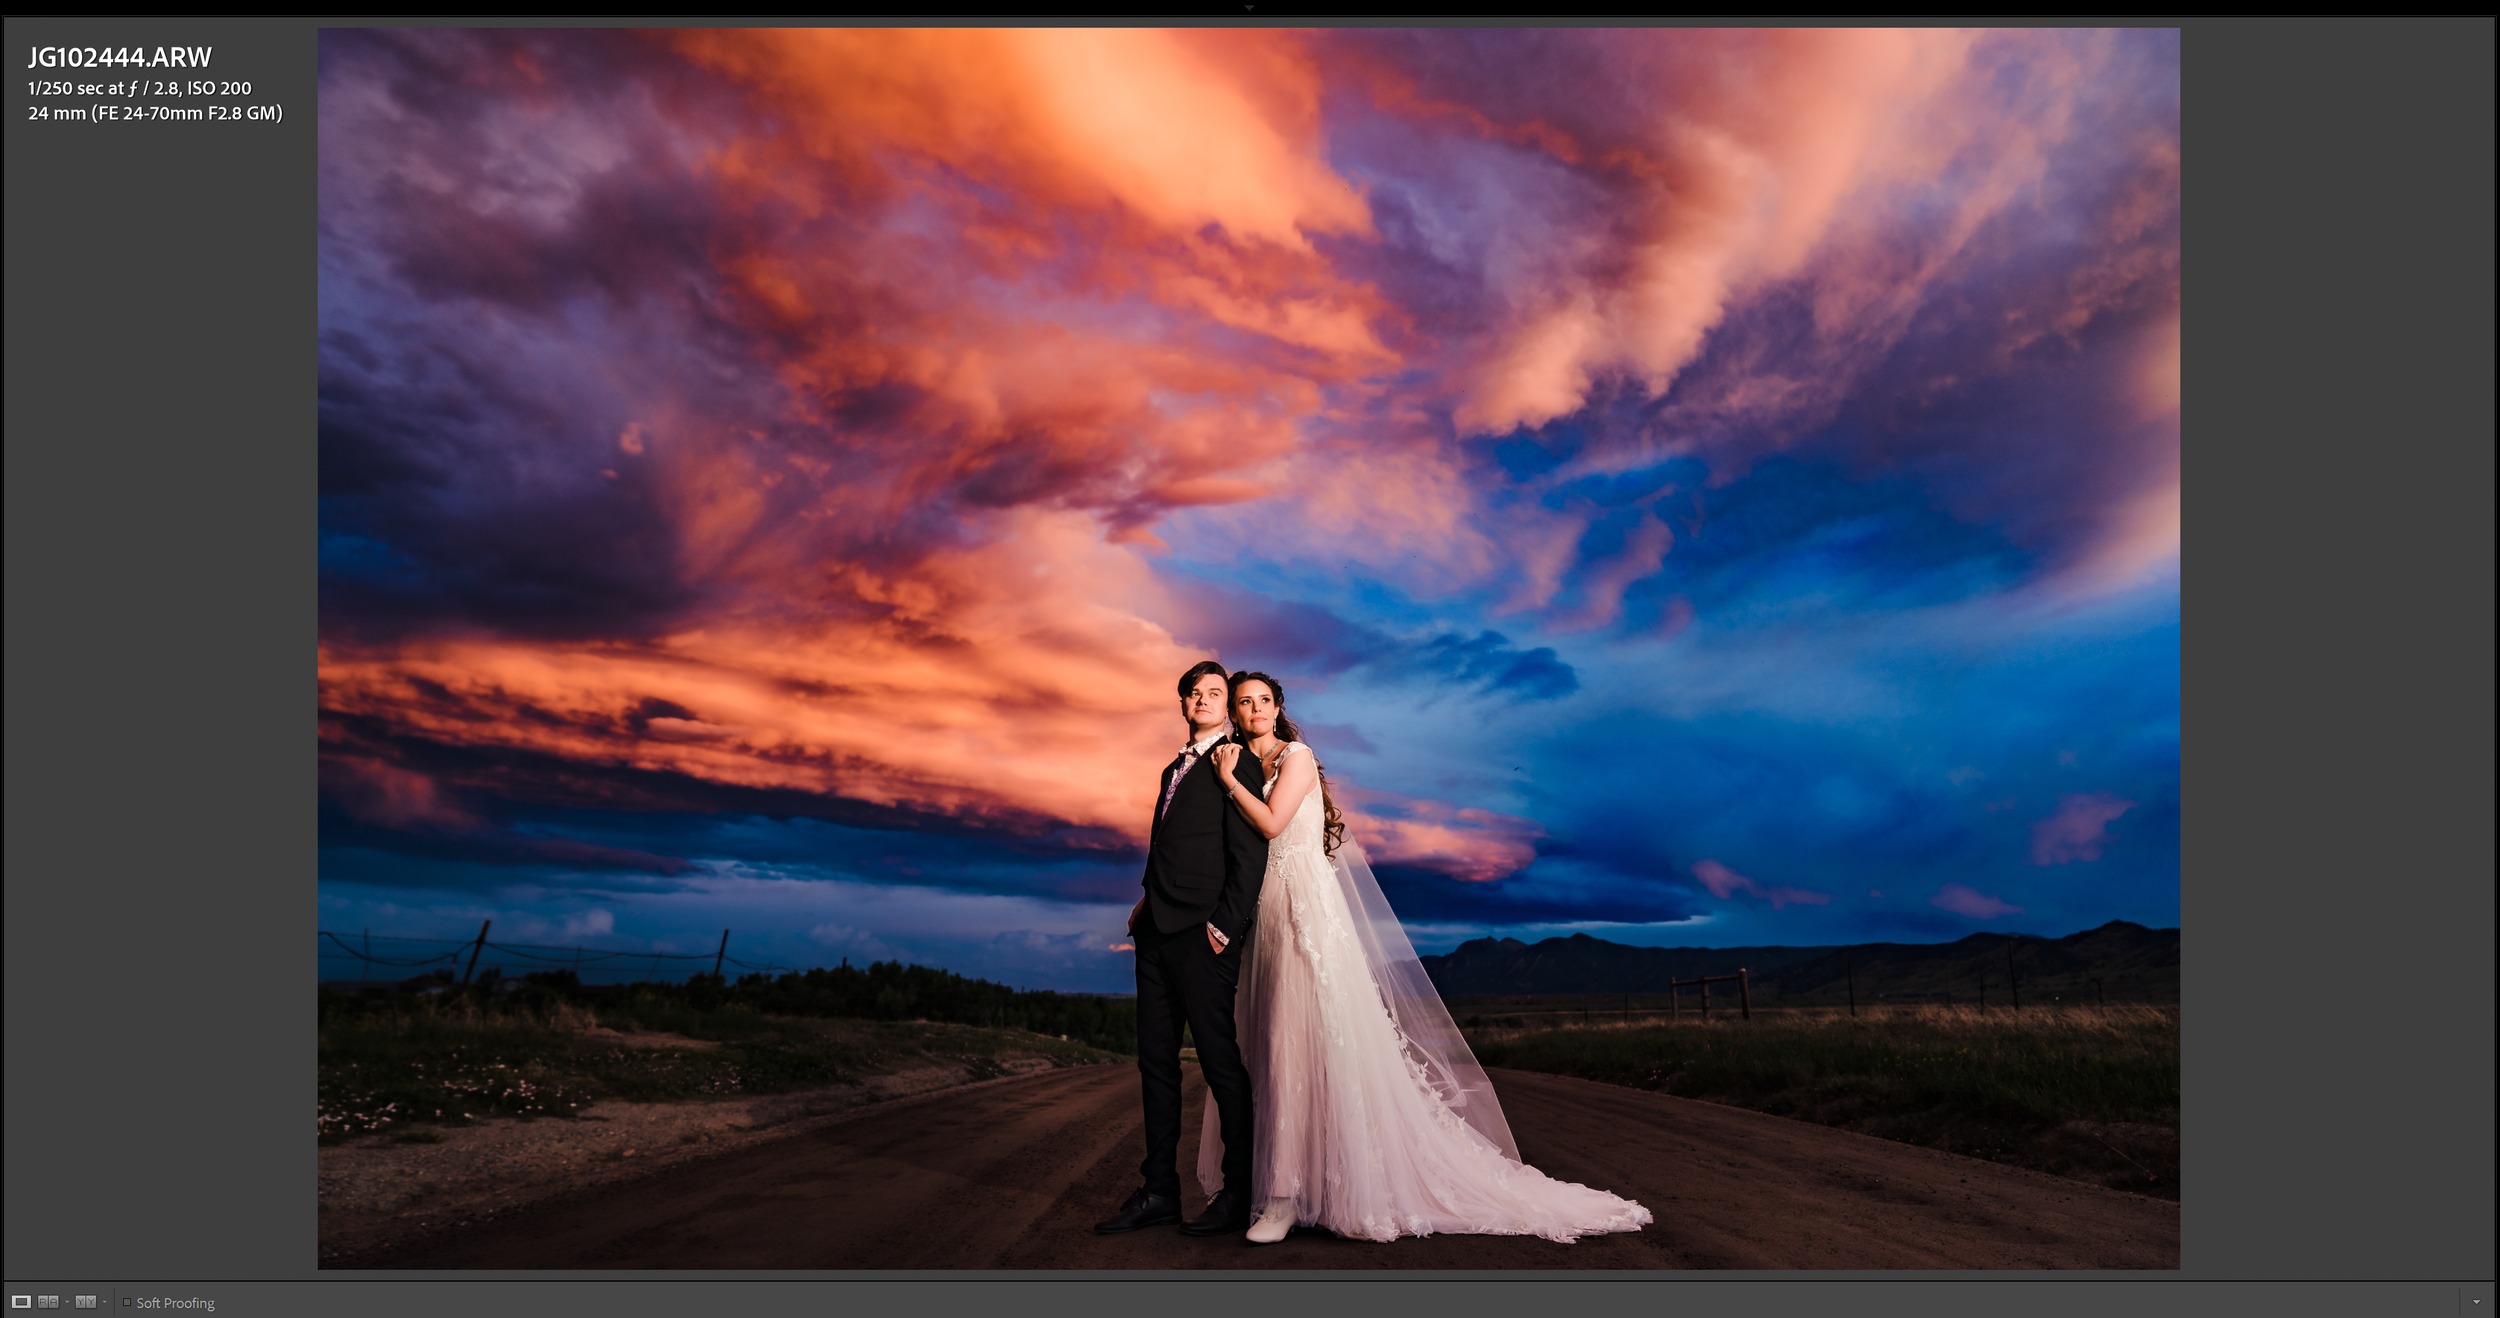
Within Lightroom, I cull in grid mode on the left monitor and loupe on the right. I set the grid thumbnails as large as they go. For me, on my 27” monitor I am seeing 8 photos at a time (2 up X 4 across) with each photo roughly 4x6”. So rather than seeing only one photo at a time and going back and forth, I am seeing 8 at a time. In most cases, I can decide on which photo to keep by looking at this 4x6” thumbnail. But, on the rare occasion that I need to look closer, on my right monitor I have it set to loupe so it shows me the single photo that I am on. This process has worked well for me and is a huge time saver.
At this point, I still cull in my photos manually and give the final keeper a 1-star. During the less crucial parts of the wedding day, I filter my photos in Lightroom to only show me the photos that are labeled green. By doing this, it automatically removes anything that is blurred, closed eye, duplicate, etc. This is where AfterShoot’s cull is stepping in. During the more important portions of the day, such as the couple's portraits, I turn off the green filter so that I see all the files, but I still rely on the color labeling to assist me in making decisions quickly.
Conclusion
So, in reality, how does this really help? Let’s say I shot 8K photos at a wedding. For me, AfterShoot will have labeled roughly 2.5K as green keepers. For the majority of my culling, I am only looking at the green labeled photos. Every time I want to consider all the photos all I have to do is turn that filter off. I am selecting from 2.5K photos rather than from 8K photos. If you can cull 1K photos/hour (which is pretty fast), this takes culling a wedding from an 8-hour process down to a 2.5-hour process. If you're shooting 3 weddings/month, that means you're saving roughly 16 hours of time with something that only costs $10. This is a no-brainer.
When our editor processes the edits, if they see any photos that shouldn't have made it through the culling, they flag them. This is part of the process we have trained them to do. Because they are spending a bit more time looking at the individual photos, it makes sense to give them this request. They will flag roughly 5-10 photos per wedding for review, which I will remove and/or replace before final delivery.
So let’s hear from you? How do you use AfterShoot? Has it saved you time and money? What are some of the struggles you’ve had setting it up? Are there any features that you wish it had?
Again, if you found this helpful and plan on giving AfterShoot AI Culling Software a try, please consider using my referral link to receive a 10% discount.
